Saturday, November 17, 2012

Fabulously Small splendid giveaway

Well, we are not back into business yet but I did take some time on the computer to check a little on the mini blogs and :

"Handmade-by-Fabulously-Small-combo" fantastic giveaway
Just wow. This would look so great in the striped study (on a brick wall, I forgot to mention I was attempting to brick the study a little before I began the work on the sea otter, I'm still unsure if I'm going on with it, but this picture inspires me to go further and use my +1000 handmade little paper bricks -hey, I've even taken pictures this time ;), the thing is that I've realised that as much as I didn't mind cutting out the bricks, I really dislike gluing them ^^', well we'll see :D... ).

Oh, it's here to enter the giveaway !


Hugs to all !
Marion

Friday, November 09, 2012

Biiig sea otter and future lights

It's big :

And very unfinished of course. Don't mind the body shape, there is a pin in the back that makes everything look weird ^^. It's really really big. As a sea otter is a rather big animal and I wanted to be able to make much details, I was going for big Steiff size (70 cm, my dream antic teddy is this size, if I had room, money and was not afraid of awful-hundred-years-old thingie that can be in the stuffing, I'd own it :D), but it's actually bigger.
But you can see my new darling Bespaq, by the way ^^.
Ok, after having changed the neck joint, now the arms are being stubborn (ok, I'm being stupid :D) so little break today :D.
I've been looking for lights for the rooms and I'm about to pass my order (I'm just trying to figure what I need exactly to make this work ^^).
I'm going with these, which I'll paint red, for the red room :
There will be one more on top of the Bespaq chair, as there is not really room next to the big bed head, so the oldest girl will read in her chair instead of in her bed (well why not).

And these for the striped study (no decent photomanip to show, but they will be upward) and the teal room :
You can see that I've tried the seattee and the other chair of the Bespaq set in the teal room and... well, they are staying here I think :). I'll have to put greenish and brownish pictures on the walls to recall the colors of the chairs and balance the teal and it should work :).
(oh, the coffee table is not a real one, it's a poor Mechtorian laying on the floor pretending he is a coffee table to help, how cruel of me)

Thanks so much Brae to have taught me the lamps could be used upside down, I just never had thought about it and this works really better for me ! :)

**********

Saturday update : little otter's arms are working good now :).
Second Saturday update : I think I've got the feet right, hey, we are getting somewhere ^^.

Wednesday, November 07, 2012

Mini sea otter : progresses so far

I think I need to create it completely before giving you the step by step explanations as it will need some twicking around.
But it won't be long to come :).
Besides, this little one is way bigger than I thought, so I'll try to make a smaller version (less jointed), as this one will be as big as a little child in 1/12 scale I'm afraid. So pretty much a doll, more than a toy for a doll. We'll see :).
I might remain silent while finishing up this little creature but I'll try to make dayly posts with the explanations as soon as it is completed :).

Monday, November 05, 2012

Sea otter mini teddy project -part 1

Here is the first post since October that could vaguely interest teddy bear lovers ^^ :). I've begun working on my first dollhouse scale teddy project, only thing is that it won't be a bear but a sea otter.
This first picture is the proportions I'm going with. Of course, it's not meant to be realistic, in fact as little realistic as a teddy bear is next to a real bear. I would like it to be easy to dress up too.
With this profile view, the shape of the body, arms, legs and sides of the head are almost ready for the pattern. Paws and gusset will certainly need several tries (especially the feet paws). It will have 5 joints and I hope it will be able to stand on its own (sitting position is guarenteed anyway ;) ). I'm still unsure if this one will be only white with black shadings or with dark body. It seems that sea otters mostly have darker bodies but this one can be a pure white breed, very rare :p.
I'm very excited by this project, as somehow mini teddies don't inspire me as much as they should right now (I'll make at least one teddy bear in 1/12e scale for my girls, reducing my big bears pattern when I manage to use the printer ^^').

PS : if that doesn't work, I can always make a bunch of mice for Ophelia ;) (yes. if it works - and it will ! Let's stay optimistic. After all, I've created around 150 teddy bears, it's not going a little outside the comfort zone that will be a problem, is it ? ^^'- it's for Brae ! To thank her for her marvelous blog updated all the time with fantastic content, her very kind support, and her cookies too !).
Stay tuned, I'll post my pattern and each step of creating this mini animal. Don't worry, I was kidding, it will be ok, I promise I'll make it work somehow, this is just a teddy after all, and I won't make you go into wrong steps. Maybe you should wait until the end before trying your own, though ;). Anyway, Acid Attic Otters, here we come ;).

Friday, October 26, 2012

Adorable stack of pumpkins Jack

GLOW in the DARK Stacked Pumpkin Jack O'Lantern Autumn Decoration - with Broom and Hat by A Bohemian Bazaar

I sooo would like this little one from Blake and at least 5 other pieces in his Etsy shop ^^. I won't be ordering this time as I'm too far away to get them before Halloween (I'm thinking this particular one would be perfect for Christmas too though !). But if you are less far for shipping or can wait, there is a 20% discount and all this look so great ! :)

edit : Oooops, couldn't resist, this one is mine, sorry :D. There is another one in pumpkin colour though :

Stacked Pumpkin Jack O'Lantern Autumn Decoration

by A Bohemian Bazaar

 I have a little led light from Cynthia Howe Miniatures (must show you, these are really great !) that will make this little Jack even more perfect as he is completely hollow, that's why I really couldn't resist :). Can't wait to take pictures ! Hope he travels fast :).

Blood red clock and very w.i.p room :)

Here is a super bad picture of my "Early american wall clock kit" (it has been days without light inside and I'm unequiped for artificial lighning). I twisted the kit a little, inverting top and bottom part and not using the pendulum and top trim (the trim is provided uncut and I had nothing to make the angle cuts anyway). It's painted blood red (by Games Workshop) and is now an airship ballast dispenser (I hope it's ok to use this art for personal project, I've not contacted the artist, I would rather ask for authorization when the room is a little more good looking, not that I'm ashamed of the current state, but ok, yes a little... In the meanwhile, I guess a link should be ok ?). Everything here is more or less provisary (the prints won't stay like this I think, the window glasses have to be cleaned up from paint, not to mention all the rest :
I swear the big gap between the high window bay and the wall can be avoided if both parts are glued together :D (believe me, it kinda works when I hold them). I've some little scratchbuilt red furniture planned for the desk and the glass shelves near. Prints have to be rethought, well, it's far from finished I promise :).
The Airship print will be elsewhere and framed, I like it.
Here is a silly picture of the actual state of things (remember all the upper part beyond the light is a closet ! No, my husband doesn't have to actually live with that all the time in our living room ^^) :
Yes, it's a terrible mess (upper window bay could be straight with much effort, very much effort, ok, has to be reglued :D and patafixed better).
I hope I can convert my cardboard walls into real wood ones some day, I would like to make an actual house with the three rooms (basement : submarine room, first floor : red bedroom, second floor : striped red room). This would be a very curious house from the outside though, but I'll try to draw it :).


Sunday, October 21, 2012

Sun Conure

Here is my beautiful (still nameless) little Sun Conure by *reve*.

He is so well-made and stands out everywhere, I'm very lucky to have him, I've not seen that much birds by *reve* ! I especially love miniature birds, they are so delicate and add life instantly.

The little vignet is made with a beautiful sheet of embossed scrapbooking paper (will add ref tomorrow, can't open its box now with baby sleeping), House of Miniatures three drawers Chippendale chest (painted aged red), a vintage doll hat, two fantastic books (red ones) by tyne759, plus one little print by me. Box on the floor is a from a Megahouse tea set.

Saturday, October 20, 2012

Tesla and little bird

As promised, here is a little photoshoot of kitty Tesla.
She is a wonderful creation of adorable artist *reve*, I've discovered thanks to Brae's blog, her amazing Ophelia and her other fantastic mini pets.
I adore my little cat, she is really marvelous.
I must confess, I have very slightly touched up Tesla's eyes, so if you don't find her completely consistent with *reve*'s style, this is the reason.
The little bird is still nameless but I'm in complete love with him. He is a Zebra Finch by Malinik Miniatures. I find my own little one even more beautiful than the one of the listing, and Ina is sending pictures before shipping (plus is super-duper quick and very kind :) ).
Tesla normally comes with a beautiful little parrot I've still to take pictures of, but I prefer her paired with the Zebra Finch in order to fit in the red room :).
Magazines are by Tyne759 on ebay, and postcards by Cockerina on Etsy.


Thursday, October 18, 2012

Red room : moving the furniture

The walls are getting a little undone there (middle seam more visible, left corner off and paper falling on the right, oh my...) but it won't stay like this, of course (books are falling too, oh and fabric is just put on to simulate the beddings). I think the bunk bed is not in its place here, there should be more space between it and the window, everything was falling apart as the right wall had come undone when I put the fabric wrapping, which was too big for the bed, well, you get the idea ^^... I can't glue things right now, I may have to move home at any time so the diorama have to stay easy to carry around :) )(but yes, it's frustrating to have things falling apart all the time and quite uneasy to put back straight and square).
The chair is not the definitive one. It's a Bodo Hennig metal chair (a little aged) to go with the sewing machine in the submarine room.
A lovely upholstered bigger one would be nice maybe ? Now, with the (simulation) beddings on, I wonder (real question, I have no idea here) if that would not make too much fabric, it may on the contrary balance very well the beddings. A wooden chair maybe ? I've to go hunt for chairs :).

I've tried a photomanip replicating the little table, just to have something more in the colourway. It's a little too small here, I suppose, but I like the light wood being more present, as everything is very red and makes the whole thing quite dark.
The more I look at the picture, the more I'm getting used to it and loose size and spacing concerns. It needs something bigger, right ? I'll go hunting for fancy little kits that might work too :), just in case, the chair being still the first option :).
Thanks so much, Brae, things are getting a lot better ! (I think :) )

Wednesday, October 17, 2012

Agence Eureka

If you don't know Agence Eureka, be sure to check it soon !
Here is 
the blog, the Flickr.
See especially the "paper craft" album, there are hundreds of vintage paper projects that would look perfect in miniature :).
I will print as soon as possible these two for the submarine room (sewing area will be northpole themed) :
famjournal014 by pilllpat (agence eureka)
famjournal014, a photo by pilllpat (agence eureka) on Flickr.
ours by pilllpat (agence eureka)
ours, a photo by pilllpat (agence eureka) on Flickr.


I wonder how small can be made this kind of little cars :

001 by pilllpat (agence eureka)
001, a photo by pilllpat (agence eureka) on Flickr.

And I'll definitely try one of the paper theatres in mini scale some day :).

theatrealibaba p0 by pilllpat (agence eureka)
theatrealibaba p0, a photo by pilllpat (agence eureka) on Flickr.

Maybe beginning by a simpler one like this :
petits theatres 2 by pilllpat (agence eureka)
 petits theatres 2, a photo by pilllpat (agence eureka) on Flickr.
The little girls will sure have plenty paper dolls
petit costumier  by pilllpat (agence eureka)
petit costumier , a photo by pilllpat (agence eureka) on Flickr.
and games
jeu 4 sports by pilllpat (agence eureka)
jeu 4 sports, a photo by pilllpat (agence eureka) on Flickr.
 I have tons of favorites kept heartwarmly in my Flickr account and projects for them, these are just a very few random examples :). Be careful, checking these is super time consuming :D.

Red room with new windows

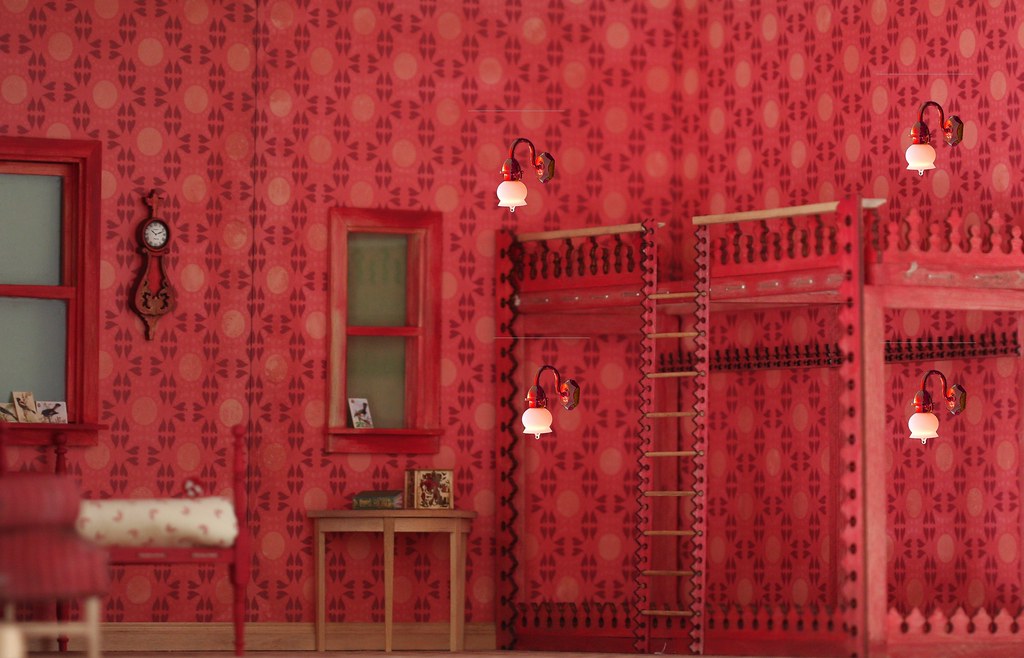
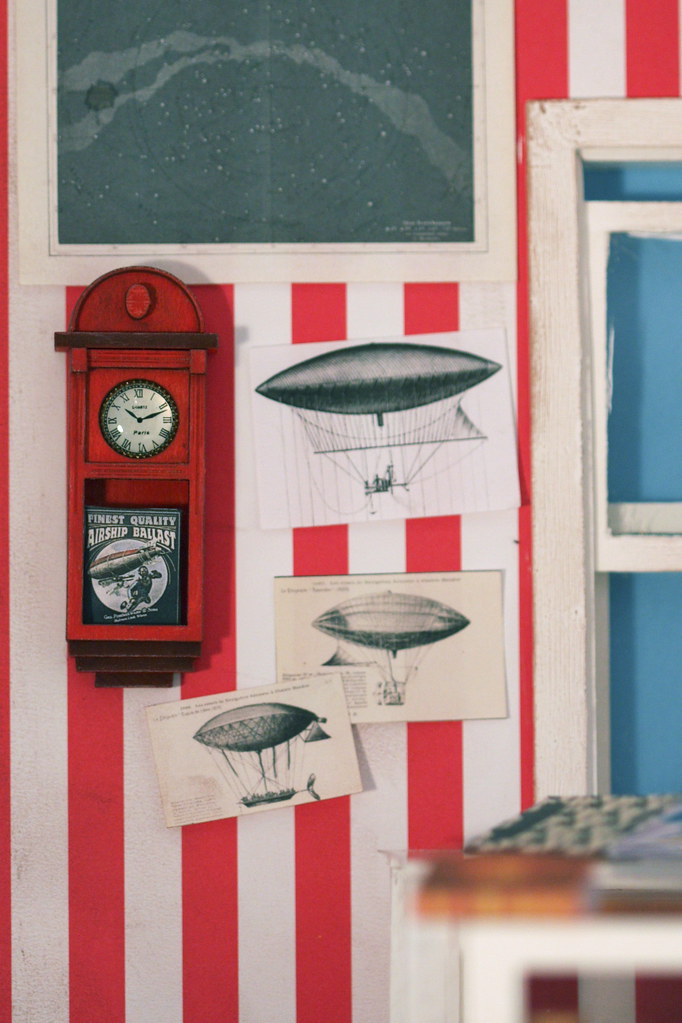
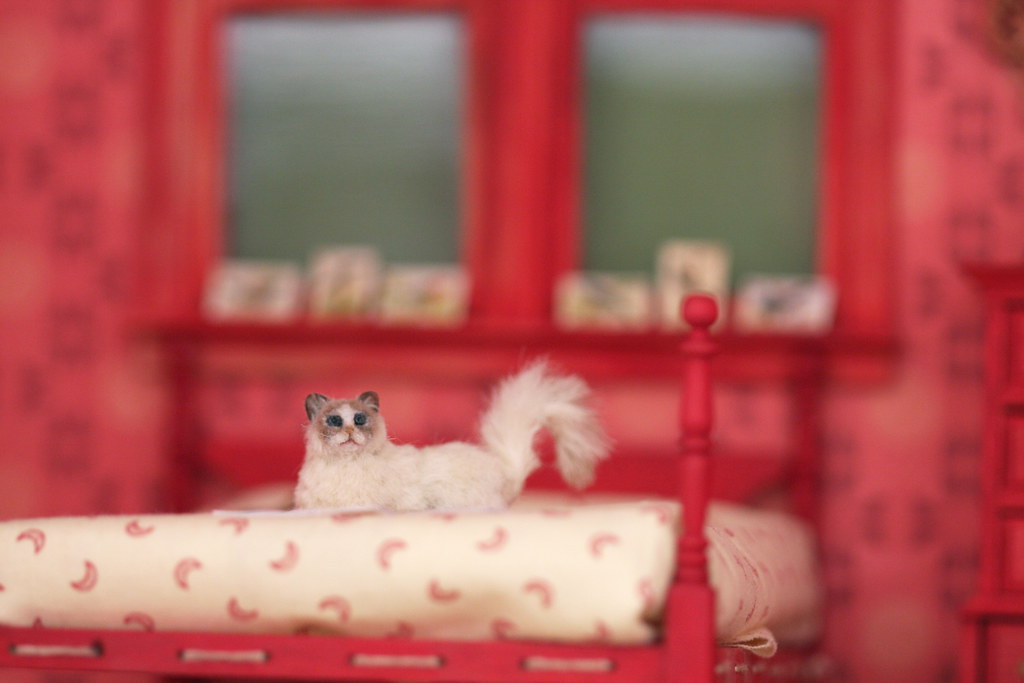
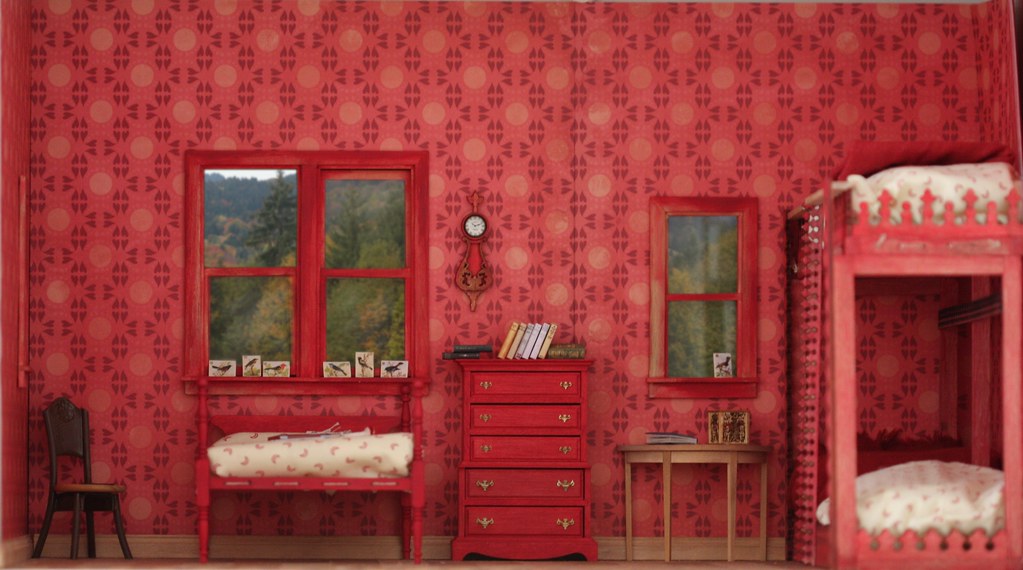
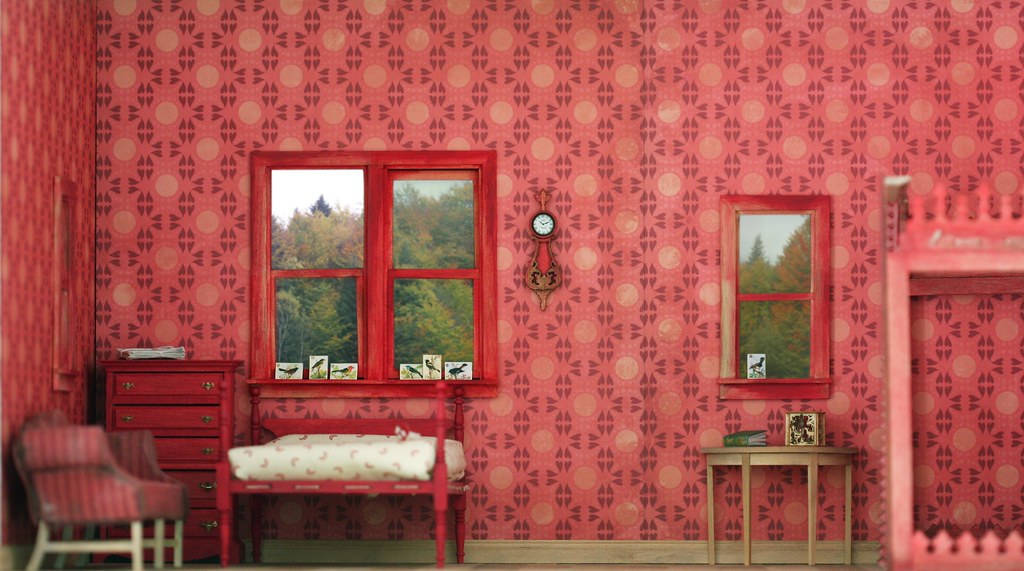
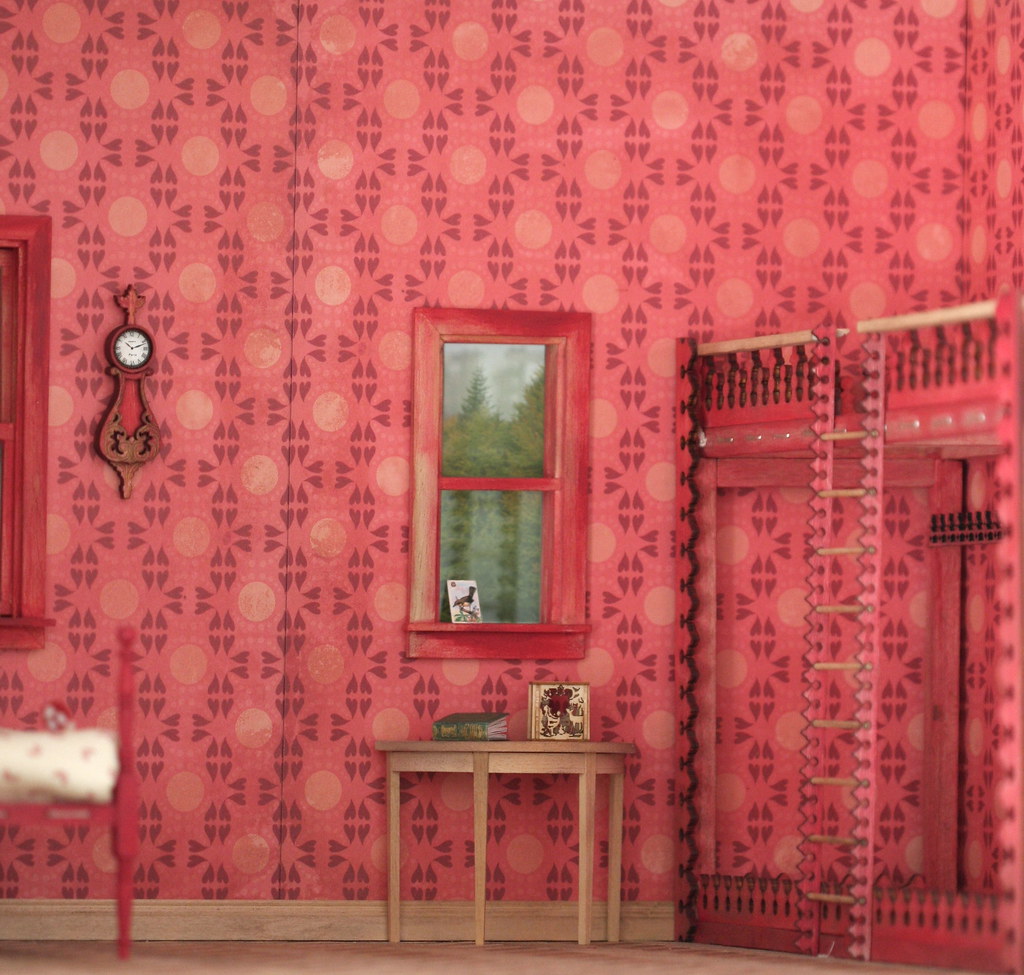
The small windows are finally set in the bedroom. I like them :).
What bothers me is the visible seam in the wallpaper, I have no idea how to make this less obvious. Talking about the walls, the corner of the left of the picture is not put properly for the moment, the cardboard sheets are still completely free one from each other (including the two front ones, the wallpaper seam itself is even hold in place with tacky paste on the upper part of the wall)(don't ask to see the surrounding of the room, it's a total mess :D).
In fact, the right side paper is above the left side one, as you may be able to see here, which doesn't help the seam not being obvious, I guess, but I suppose that even flush, it would be noticeable anyway.

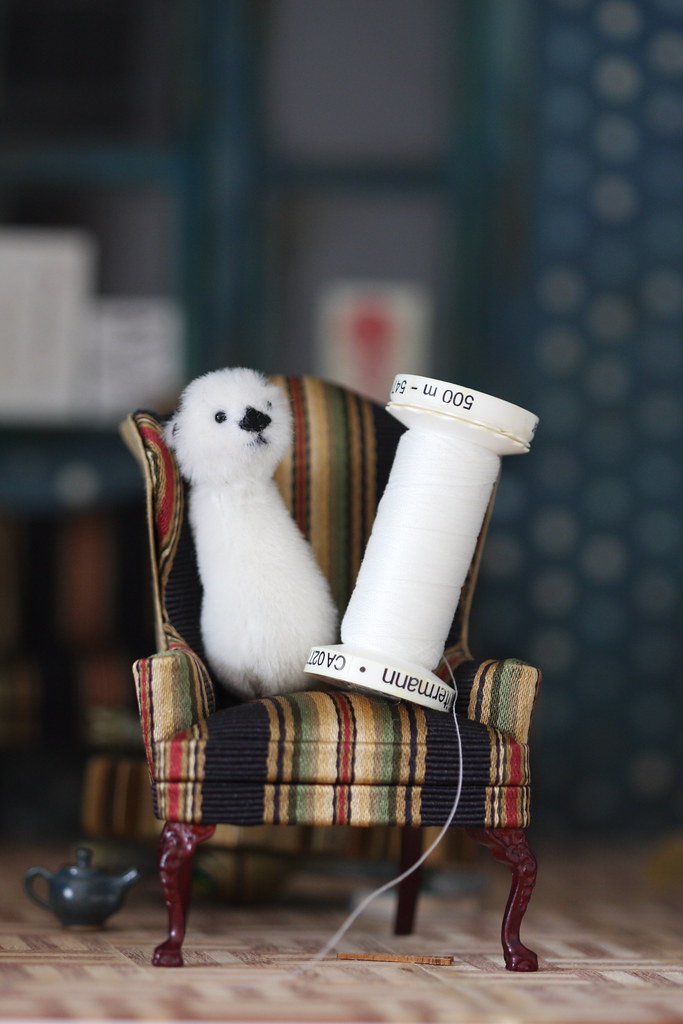
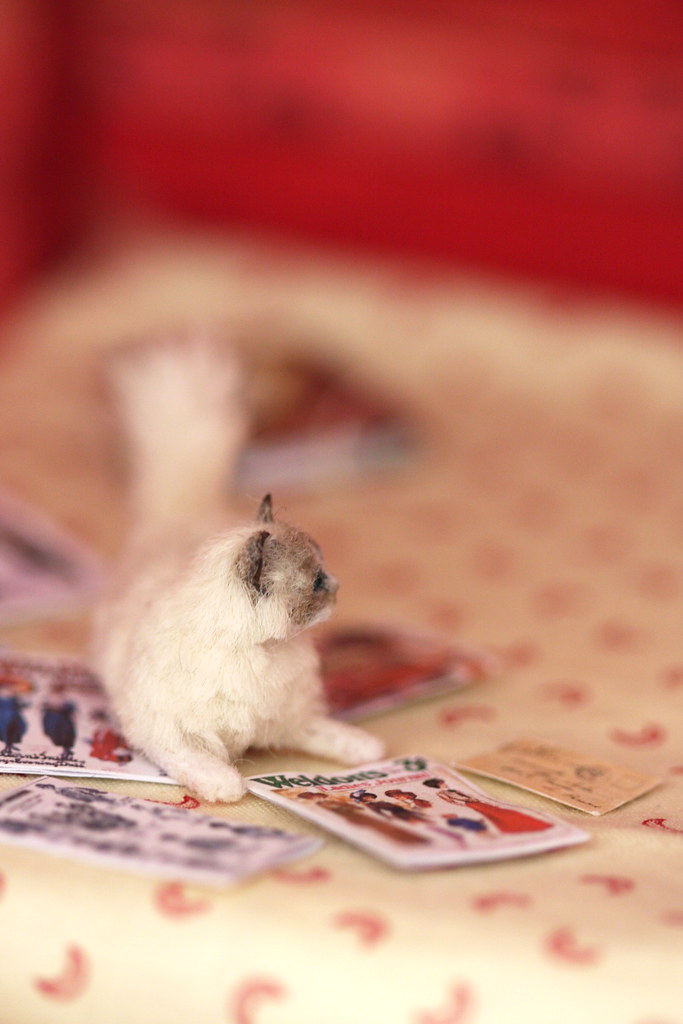
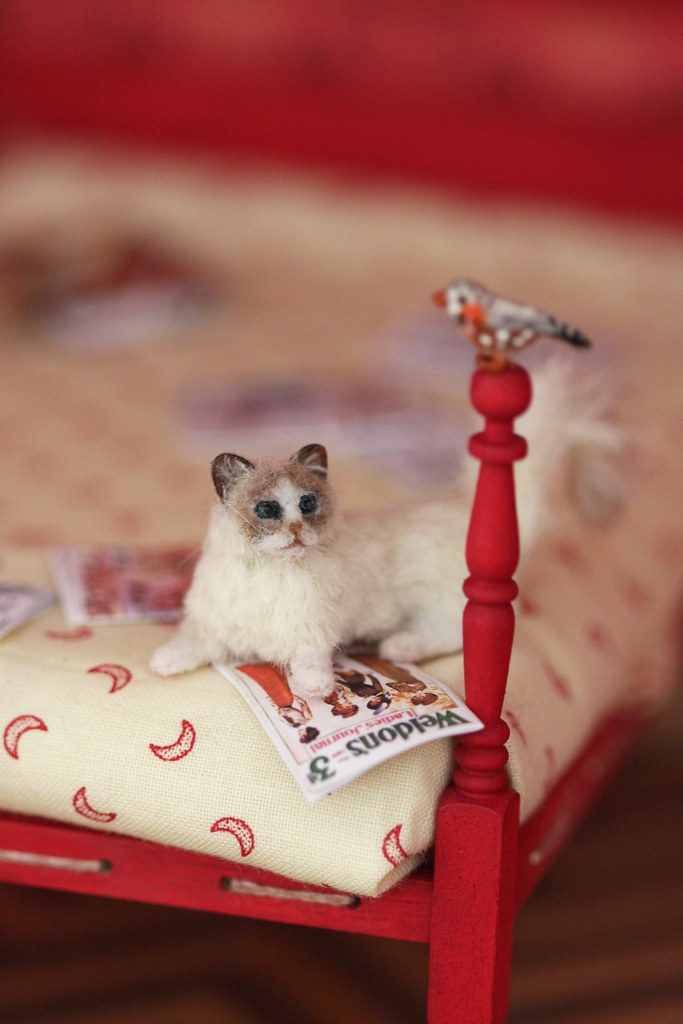
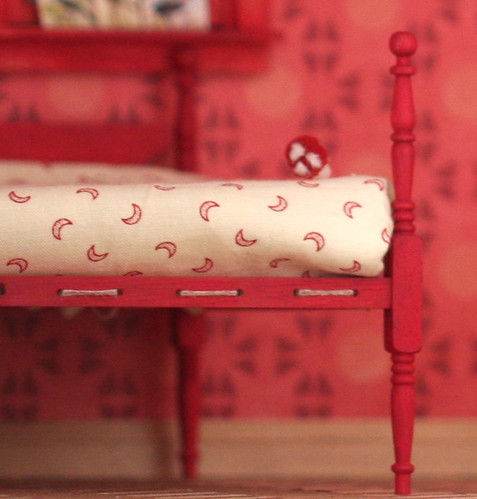
I've put some fabric on the mattress of the main bed for a test and I think I might go with this for mattress sheets and pillows (I'll make more elaborate upper bedding, maybe mini patchwork quilts real or false ^^).

I was looking for something that would be coherent in style with the wallpaper. I hope it is.

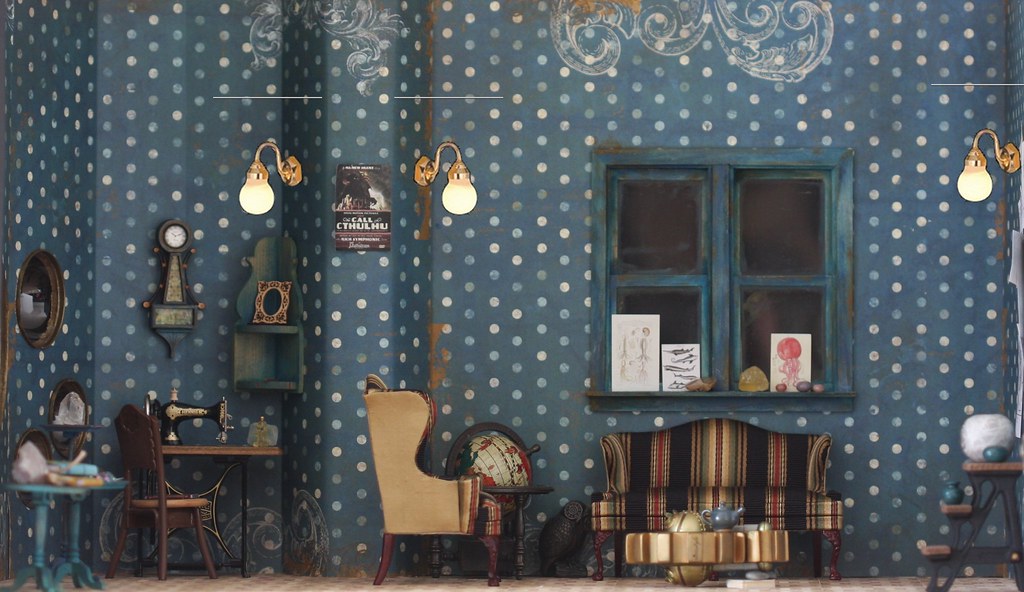
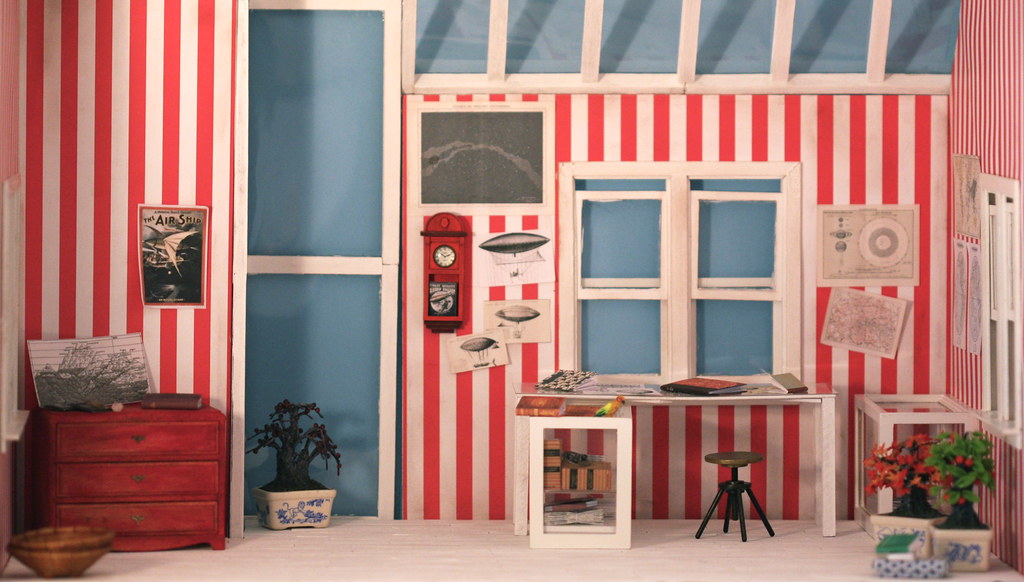
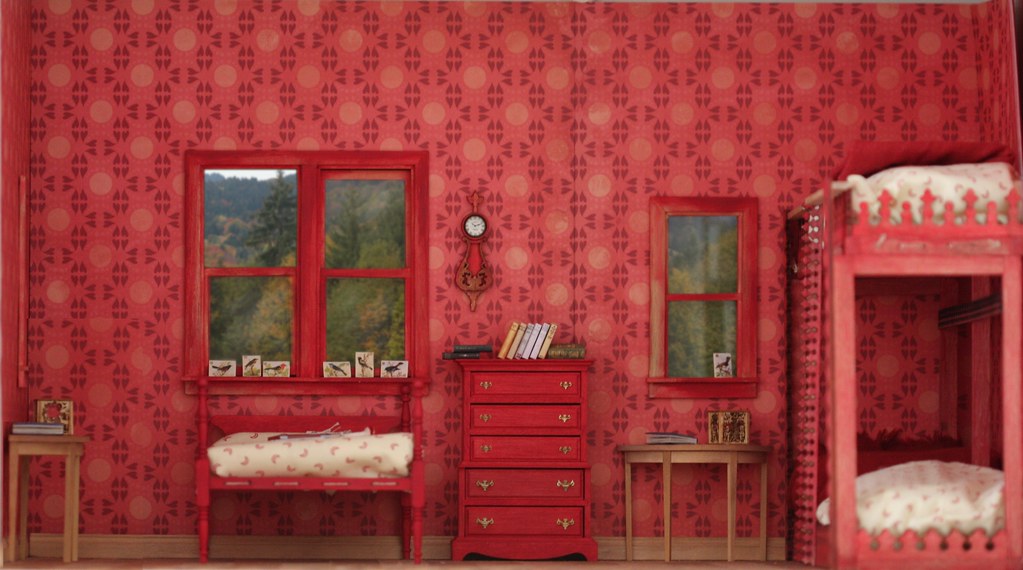
I wonder a lot about the furnishing of the room :
I'm thinking of getting rid of the sofa. It's a fail in itself (can show you in another post, I'll have to make some kind of a kit review I think) and it makes the left part of the room very crowded. I don't know what to put instead though. I have to find something between the main bed and the little table too, or to reduce the wall between the two windows (yes, it's possible ^^, I've already taken off something like one inch before putting the walls back)(not that I wanted to but the room with the window's added depht couldn't fit in the closet any more :D). It would make the room smaller though, which I don't wish that much as I would like this room to give a feeling of space.
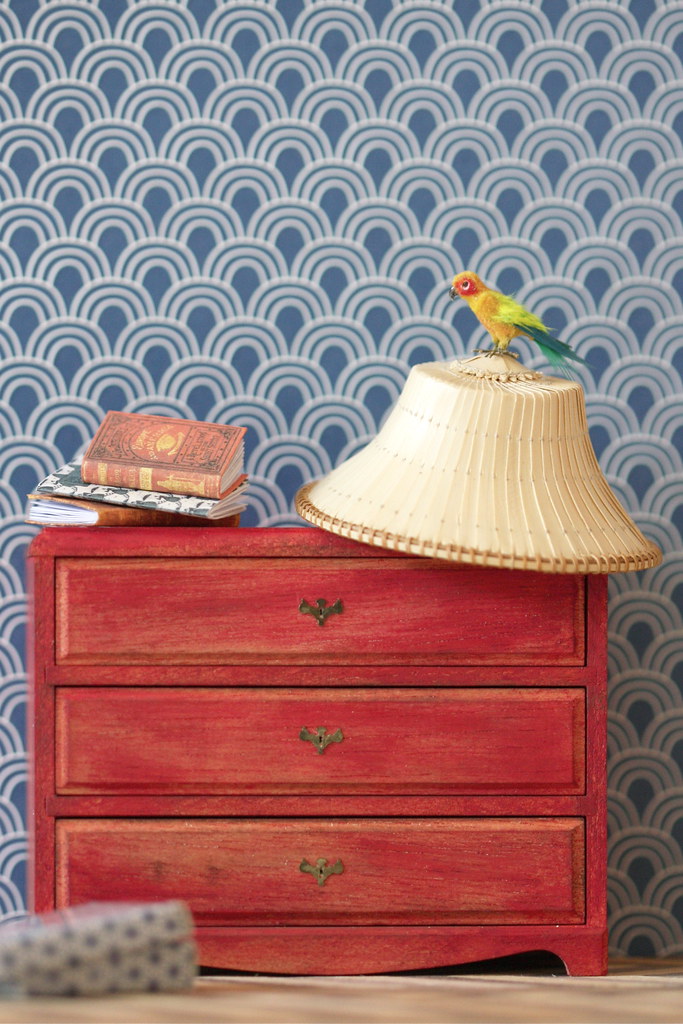
The big drawer shelf could move too (even to another room).
I like the overall look of the room but I must confess that the further I go, the less harmonious it seems to me. The fact that I've begun with a square wall with a window and extended from it does not help making things coherent, must I admit, but I'll have to do with it :).

................................

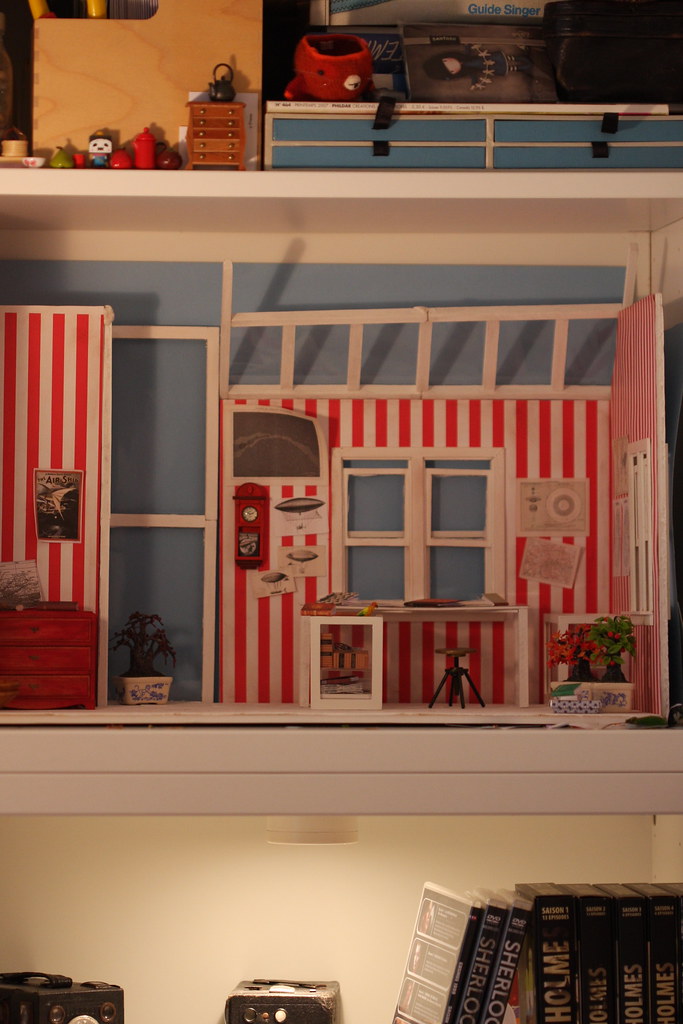
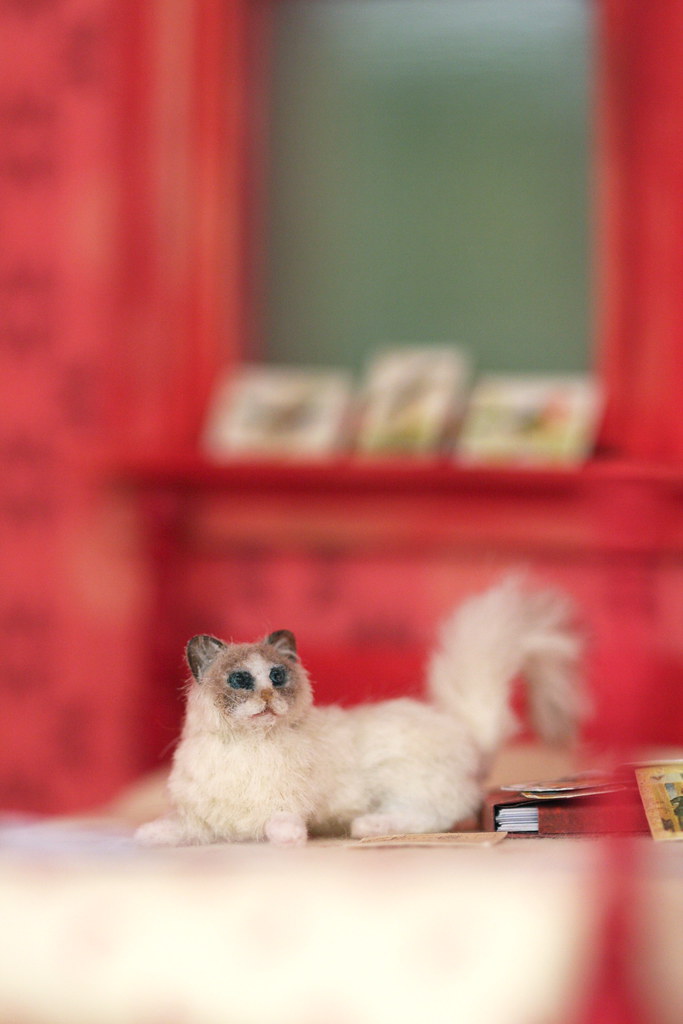
I've made the windows photomanip too quickly and the glass looks green here. Well, it's only a wip view, so that will do I guess :). Here is the picture before the manip :
I really don't like to show those unedited pictures as the paper next to the window gives a suffocating feeling to me. The room is in a closet so I don't have any depht which make it difficult to set properly any print (I'll make it a try whan I can have access the the printer though), but I like playing with Gimp so it's a problem I can solve this way :).

Tuesday, October 16, 2012

Antic world globe

As this is quite an important center piece for me, I was prepared either paying a big lot of cubits (gils ? money ?) for a convincing antic looking world globe, either spending an awful amount of time trying to make one. And I found this one on ebay, for a steal, and I really think it's perfect :). Ok, yes, well, this is a pencil sharpener, but what a pencil sharpener ! ^^ Very good aged metal treatment. The globe itself is made of a two parts metal sphere, the aligment is not perfect but I guess that if I'm not too chicken, I may be able to make it better, gently moving one part. And the globe spins round of course :).
There seems to be several colours finition available for the map, I've seen one more pink and teal but that may have been just a matter of bad pictures.


Sunday, October 14, 2012

The second clock :)

So here is  Cynthia Howe miniatures banjo style wall clock kit.
I just adore this one ! I didn't make any alteration here beside the colors.
The little side parts are left untouched in their perfect bare laser-cut wood glory and they kinda look old gold color, or maybe a little rusty, I love it :).
The other wooden parts are very gently touched with a wash of a mix of Prince August blue and green (got a starter set of colours ages ago, I'm used to Vallejo/Prince August and Games Workshop paints, yes well white metal mini figures to paint, Warhammer and all, any one ? ^^) so that laser-cut carving still shows a little in wood colour. The bottom part has received a little brown and white chalk in addition. Oh yes and there are very slight highlights in white chalk pretty much everywhere too (I just put chalk on my finger and rub it slightly over where I wish when paint is dried. It's easier for me than dry brushing paint and I can remove it if I don't like it or am too bold. As I tend to mess up things easily, it's a better way for me not to ruin the work with little finitions :D).
The graphics are the one provided with the kit. I wasn't sure if I would use them at the beginning as they are kinda pixellized (not the good word I mean here : little points from the printer showing) and the colours didn't match the teal wood that well. As there were two prints of each image, knowing I had spare parts if problems were to occur and that I wasn't that enthusiastic about them anyway, I soaked the pieces of paper in varnish ("Nasenglanz für Teddybären", one has to do with her own tools I guess :D :D) and tadaaaa after drying, colours are a little faded, blended, aged, no more pixel showing and all the pinkish-reddish colour has gotten in the verso of my paper (yes, I don't know why) resulting in colorings that match perfectly my clock ! Plus, the varnish being very thick, it really doesn't look like paper any more. Hooray for Nasenglanz ! :)

A little clock a (very) foggy day


It's foggy today and autumn is really showing :). Little clock is a fantastic little laser-cut kit by Cynthia Howe Miniature.
This one more precisely.
As you can see, I've altered the kit a little bit :). I just got rid of the three little wood pieced at the bottom, didn't use the graphic provided and painted it red (Games Worskop "Gore red" mixed with some Prince August yellow and used very diluted and very lightly applied on the laser-cut carving, and a little less diluted on the other parts). The clock face is lovely, it has a clear little dome on it and a little gold metal crown on the surrounding. I painted this last part red too as it attracted too much attention :). Only thing that disturbs me a little is that the clock face has "quartz" written on it :D. Not very victorian, but less say little steampunkinsh-inspired people here have discovered quartz movement already (1927 for first quartz clock according to wikipedia, not that bad, in fact). Plus it's normally an american clock but this one says "Paris", oh well, after all, I've completely altered the kit, so let it be made in Paris, why not.
I love the musical instrument shape it has without the bottom part, it reminds me a little of a violin (ok of a cello but that's because I'm completely biased as a cello player :D).
Have a wonderful sunday ! :)

PS : thanks a lot to Brae of Otterine.com for (all of her blog and more precisely here) her great post about her banjo clock. It was super great to discover these wonderful minis :) (this particular banjo clock will be next post, I made a blue one for submarine room :) ).

Saturday, October 13, 2012

Ceramics again :)

I've posted them on Flickr but I've to share here my little collection of CNC Pottery little pieces :

I especially adore the big saggar fired vase, it's fantastic ! There is still one in this style in the Etsy shop :). Carolyn Nygren Curran is a great artist and really an adorable woman :). As I was there at the opening of the Etsy shop and there were some glitches with the adding of France as a shipping location to the pieces and especially to one I wanted (hey how come this little beauty is still there ? ^^), I chose the little round one instead but Carolyn sent me the other little green one of this photo as a gift, so kind !

Oh, the lovely little stairs  are Bodo Hennig, they are painted metal and wood, great quality. I love them :).
Hugs to all !

A little teapot

I've purchased the most adorable teapot by Jason of Dragonsgate.
It is a fully functional teapot with top removable and a big real hole (I really don't like mini teapots without hole, it seems wrong to me), I love it a lot !

Floorings quick review 2 (quicker ^^)

Teal room has a fancy wooden flooring by Houseworks. I completely messed up the gluing so it's not as fancy now (don't glue it directly on an Ikea bësta shelf, when it's super hot and with Cleocolle glue, even one at a time letting drie long with lots of dictionaries upon it). So I just put some pictures of the packaging, just in case it can help ^^.